

20 Apr FOLLOW THIS DECORATING HACK TO MAKE MARBLE EGGS FOR EASTER

Happy Easter! Every year our Easter tradition is to decorate eggs. It’s a special Easter tradition that was passed down to me from my Polish Nanna. I have many fond memories of decorating eggs with her as a young girl, continuing the tradition with my mum and now with my own kids. Every year we come up with a different decorating design! This year these marble eggs are my favourite so far so I thought I’d share this fun and easy decorating hack with you all.
INGREDIENTS
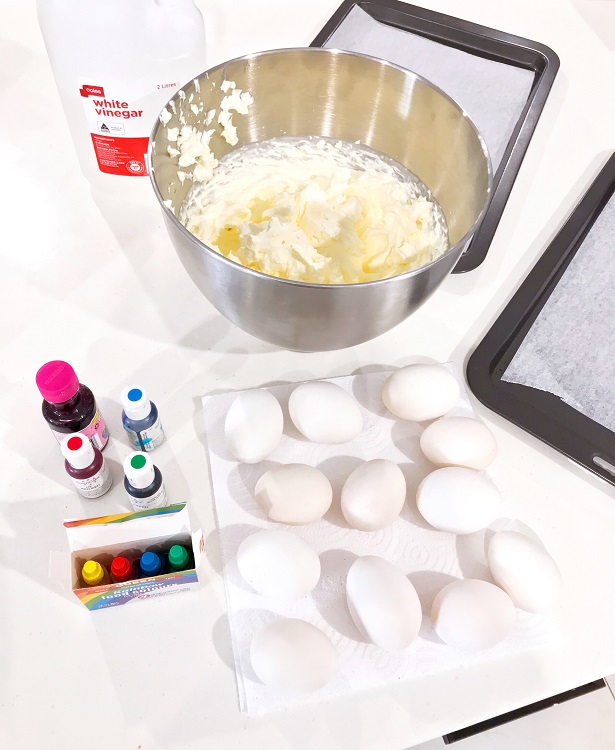
12 White hard boiled eggs
600mls of Cream whipped to stiff peaks
One Litre of White Vinegar
Baking paper
Toothpicks
Disposable gloves
Food colouring in various colours
METHOD (7 STEPS)
1. Cover the hard boiled eggs with the white vinegar. Make sure they are covered completely and let them sit for 2 minutes. Drain then dry them with a paper towel. This process helps to make the colours stick!
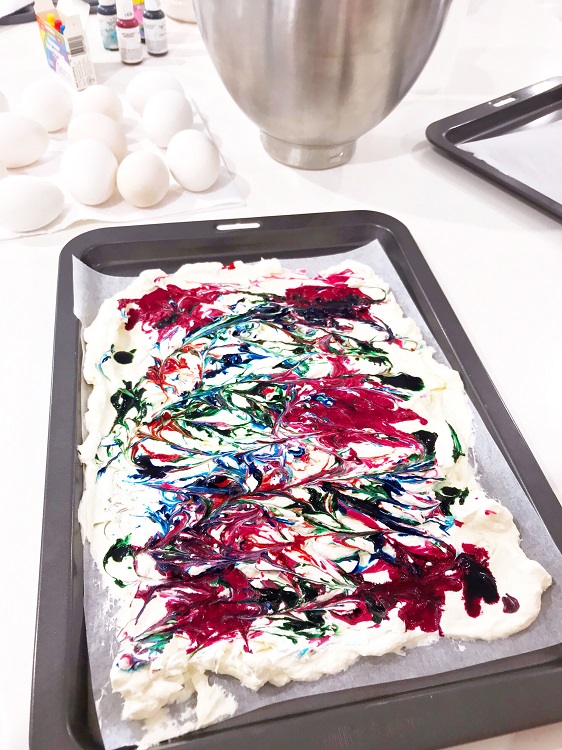
2. Line 2 cookie trays with baking paper and spread half the whipped cream on each tray in an even layer.
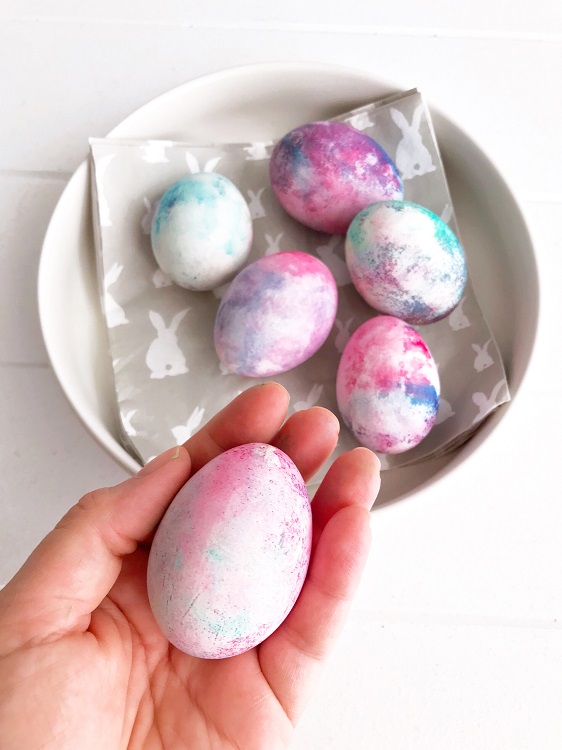
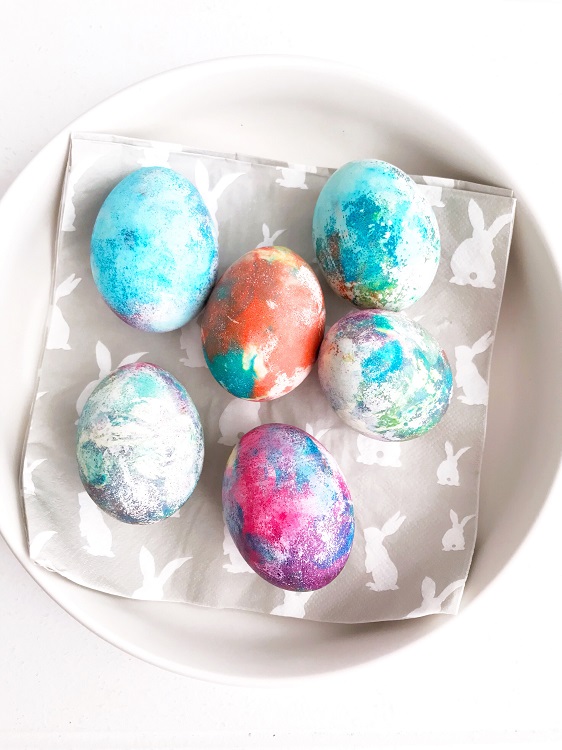
3. Drop the food colouring in random spots on the cream. Choose at least 3 different colours to create a beautiful marble look.
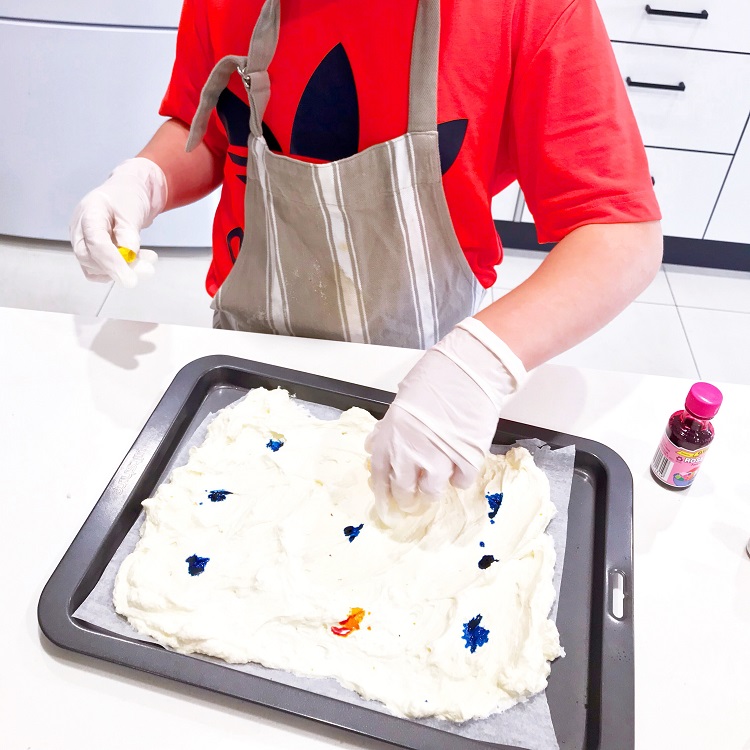
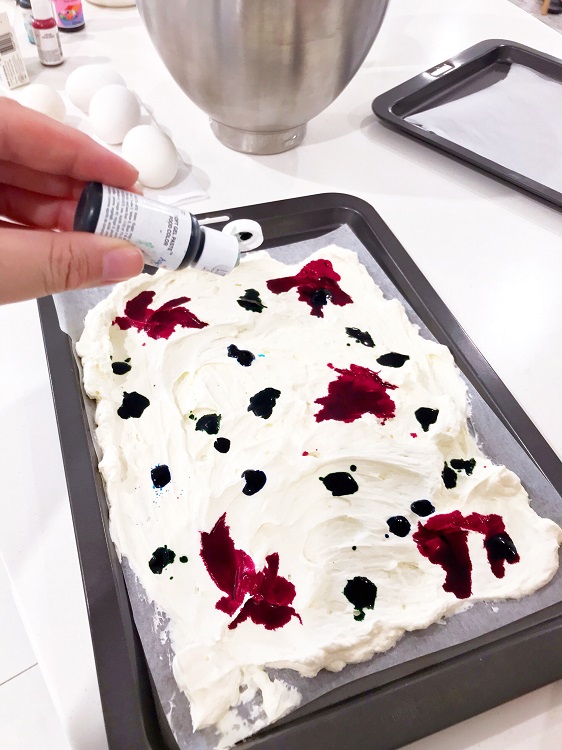
4. Use a toothpick to swirl and slightly mix the colours through the cream for a good marble effect. Don’t overmix it though!
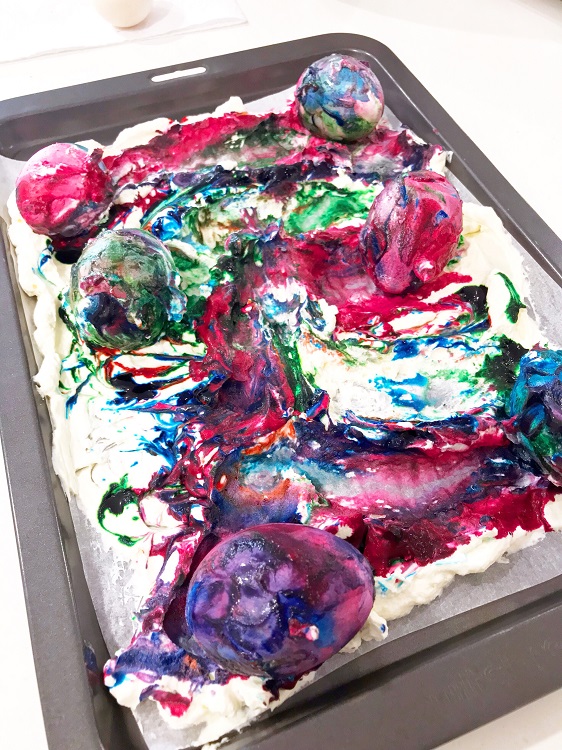
5. Then roll one egg at a time through the coloured cream. Make sure that the entire egg is covered. Repeat this process with all the eggs. I use 6 eggs for each tray.
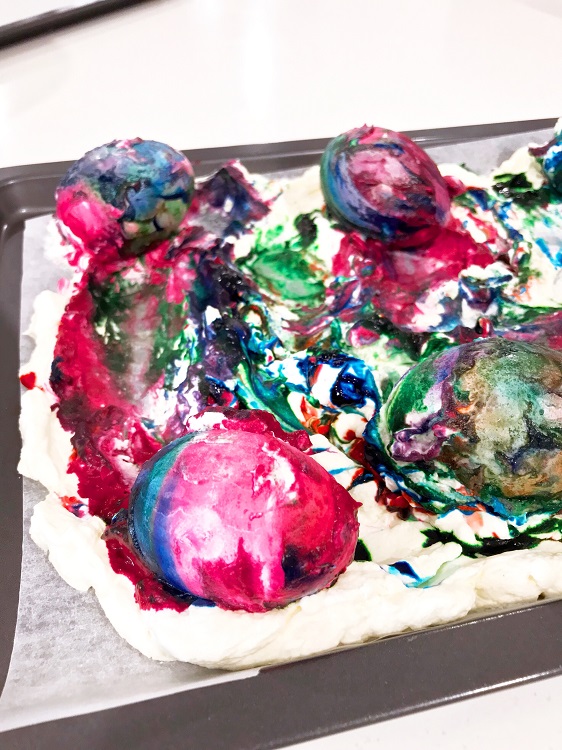
6. Remove eggs one at time (make sure you wear gloves) and rinse each egg under water until all the cream is gone. Pat the egg dry with a paper towel.
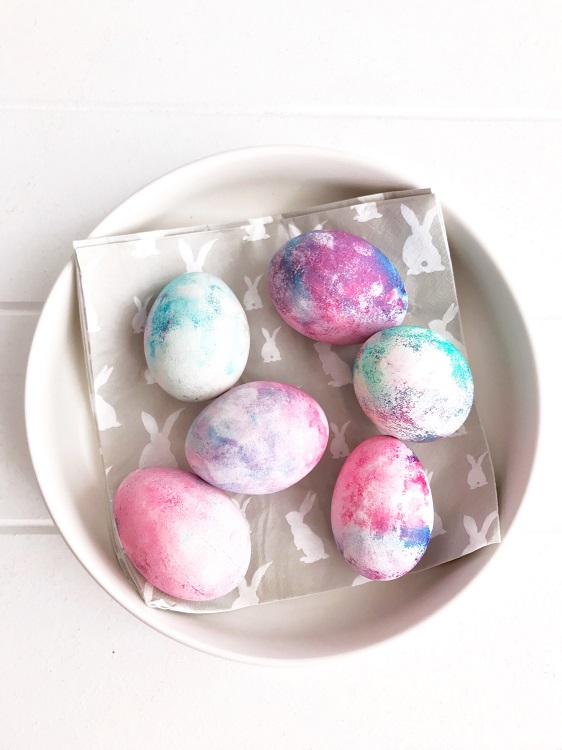
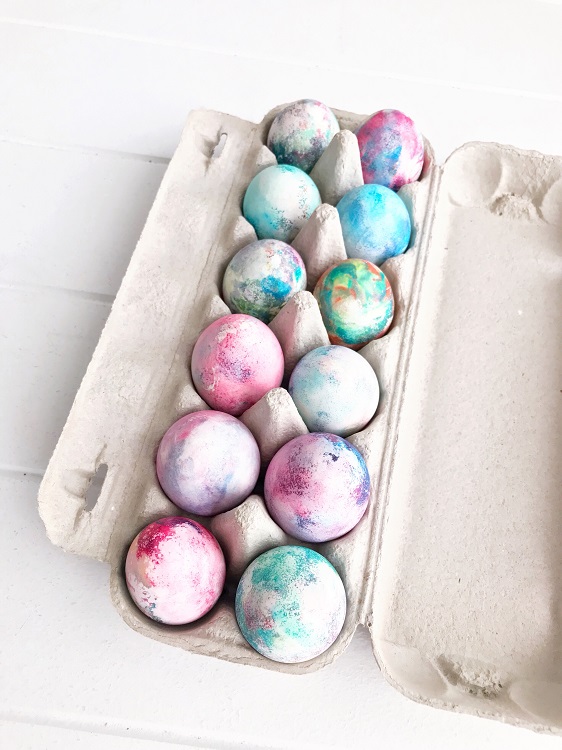
7. Display the decorated eggs in a beautiful Easter basket to eat with family and friends over Easter.

Hope you have a fabulous Easter!! x